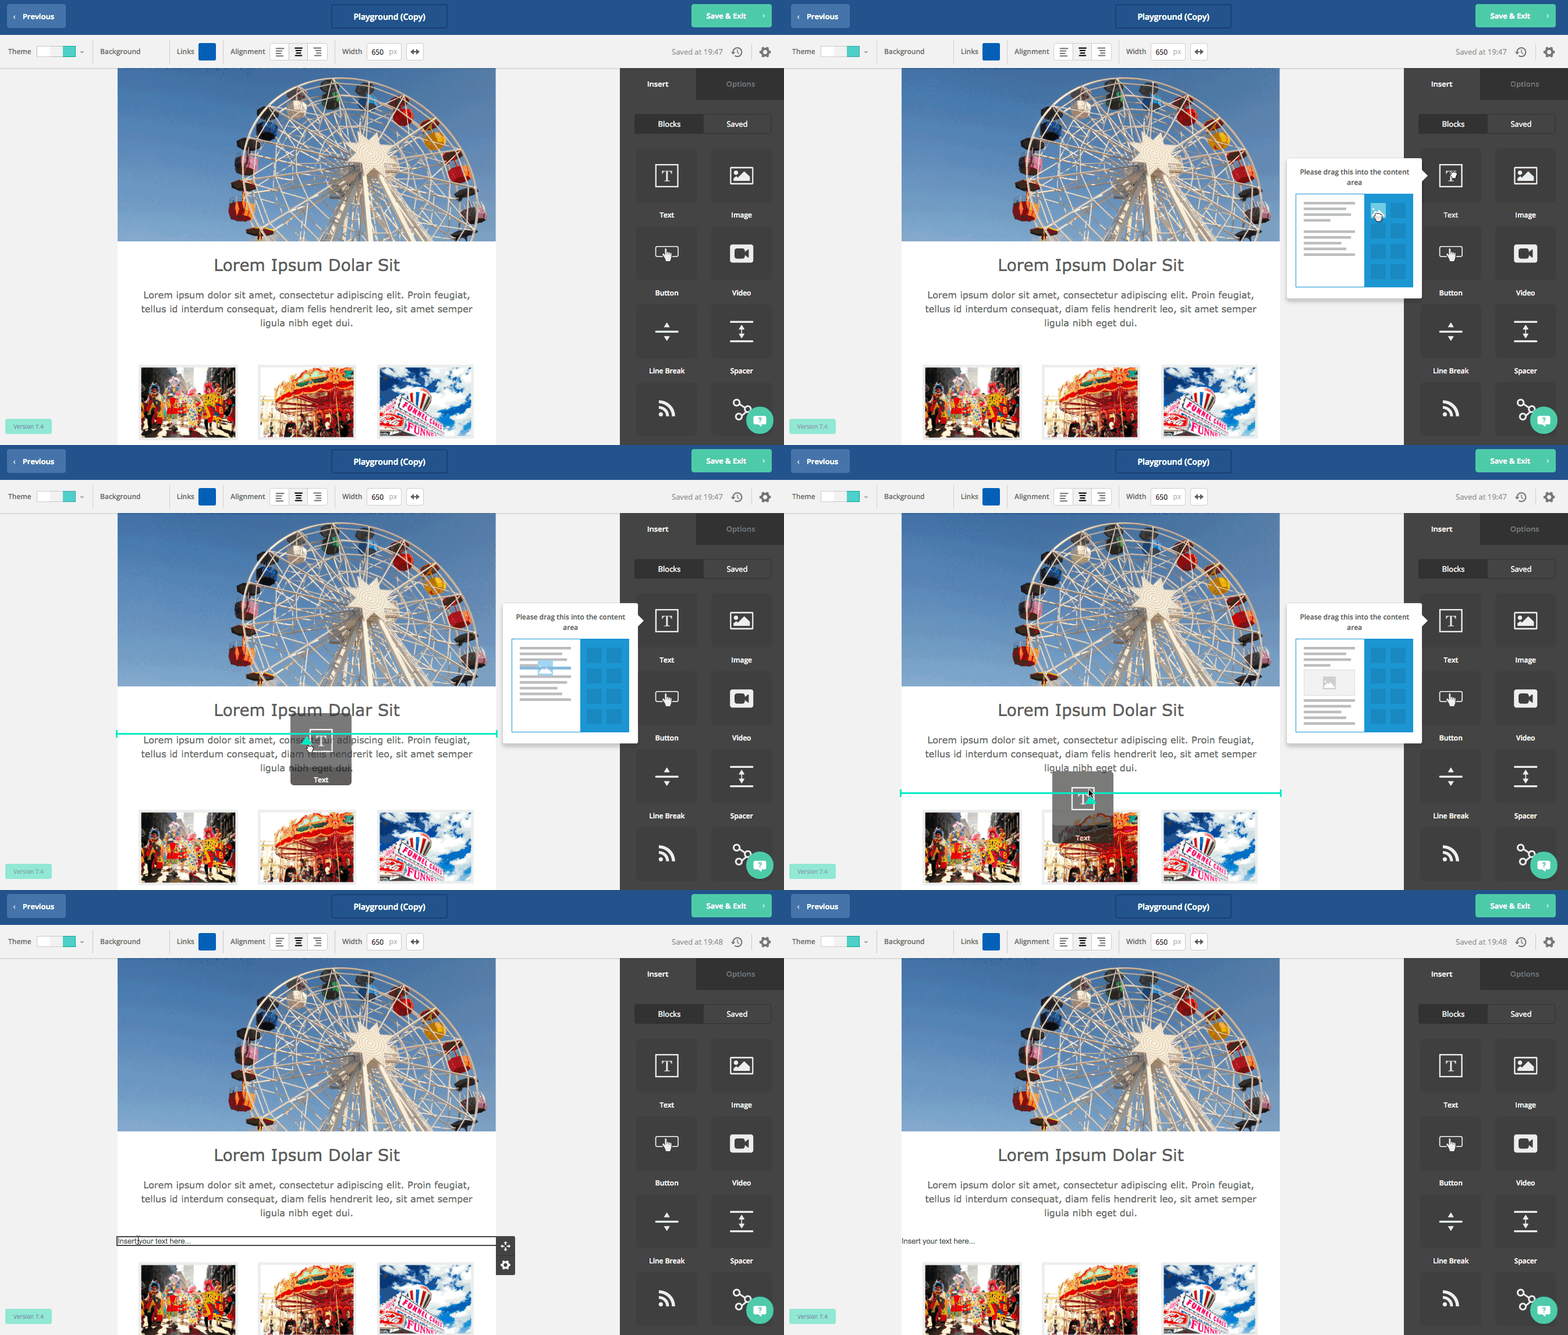
The Designer makes it easy to quickly craft beautiful, custom email campaigns without having to know code. This article will walk you through each content block type, how the drag and drop feature works, how to create columns, how to add and resize your images, how to format your text, and how to add a button to your campaigns.
Drag and Drop Content Blocks
Content block are the building blocks you use to create your campaigns. Our Email Designer has nine different types that you can use:
- Text - use this to add copy
- Image - use this to add any images
- Button - use this to make a call to action stand out
- Video - use this to link to a video on YouTube or Vimeo
- Line break - use this design element to add a line break in between your content blocks
- Spacer - use this design element to add space in between your content blocks
- Social - use this to add your social media follow pages and allow contacts to share your message on their networks
- HTML - use this to add your own custom html code (ie, if you want to include a countdown clock)
To use any of these content blocks in your email, click on the content block of your choice from the Insert menu on the right, and drag it to your desired spot in the email. As you drag the content block to the template, you will notice that a green highlight line appears. This line indicates where the content block will be placed when you drop the content block by unclicking.

Add a Column
You may also want to add a column to your email campaign. This can be done by dragging a new content block to the edge of any existing content block of your choice. Move the content block around until only the edge of the content block you want to be the first column is highlighted.
You can adjust the column size by clicking on that content block, mouse over the side, and drag the column to your desired width.
Add and Resize Images
To add an image, simply drag and drop the image content block to your desired spot. Click on the content block and in the modal pop up, the Image Manager will display all images you currently have. If you wish to add a new image, click on the “Add New Image” button on the top right.
To insert your image into your campaign, mouse over the image of your choice in the Image Manager and select “Choose.” Once your image has been added, you have the option to adjust its placement in the content block, crop and edit it, replace the image with a different one, drag and drop that image content block into a different section of your template, or resize your image. To resize an image, mouse over the image and on the bottom right, you will see a two-directional arrow. Click on that two-directional arrow and drag your image to your desired size.
Formatting Text
The Email Designer also offers several different options that you can use to format your text. This includes adjusting line height (space in between each line); changing the font type, size, and color; adjusting margins and padding; and embedding a link.
The Options tab on the right-side menu allows you to adjust the line height, set margins and padding, and modify background color. To use any of these options, click on the text content block you wish to adjust, and click on the Options menu tab.
To adjust the font type or to add styling to your text, simply click on your desired content block and a modal menu bar will appear where you can apply a different font type, adjust the font size and color, and align your text. This menu will also let you hyperlink text and insert a personalization tag.
Add a Button for a Call To Action
Adding a button to your email campaign is a great way to make a call to action stand out to your reader — you may want to use this for webinar registrations or a .pdf download. To add this button, click on the Button content block and drag it to your desired spot. You will see that we have added the placeholder text, “Click Here.” To modify the content in the button, click on the button and delete the text provided and type in your own. The Options menu to the right will allow you to add a link that will take your reader to your website of choice when they click on that button. You can also control the background color as well as the font type, size, and color with the Options menu.
Column 2
