This is the last step! Learn how to quickly upload your contacts to your ArchReach system.
You can upload contacts manually or bulk upload them (faster method) using a csv file. Watch the short video below and follow the prompts.
Next Steps:
- Are you still logged in to your account? Good. If not, just log back in.
- Create a csv file for uploading. If you don't know how to do this, follow the instructions below under "How to Create a CSV File".
- Go to the Contacts tab. Click on Add Contacts. Choose the Import option.
- Import your csv file.
- Check for any errors. If there were errors, the video above shows you how to resolve them.
- If there are no errors, then you're done! Congrats on successfully importing your contacts. You are now ready to send out your monthly e-newsletters and other campaign emails.
How to Create a CSV File
"CSV" stands for "Comma Separated Values".
Here are the steps for creating a "CSV file" of your contacts for importing into your ArchReach account:
- Create a new, blank workbook in Microsoft Excel or Apple Numbers
- In the first row of the workbook, but the field names you will be using for your contact records (note that at minimum, each contact record needs to contain an email address).

- Next, populate the following rows with your contacts' information. Put each contact on a separate row. If you are missing some information for a contact, leave the cell blank:

- Lastly, save the file as a "CSV" format file.
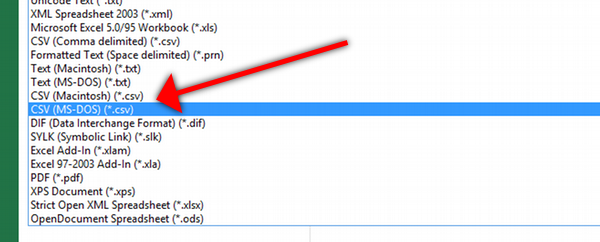
- Now you are ready to import this CSV file into your ArchReach account.
Need help getting started with your ArchReach Account? Find your answer below or reach out to support@architectsmarketing.com.