One of the more common ways to add contacts to your account is through a CSV file upload. However, you may notice that when you try to import a file, that not all of your subscribers have been added or your import failed. This document will walk you through the different scenarios that could cause these import issues, and what you can do to fix them.
How to view your recent imports
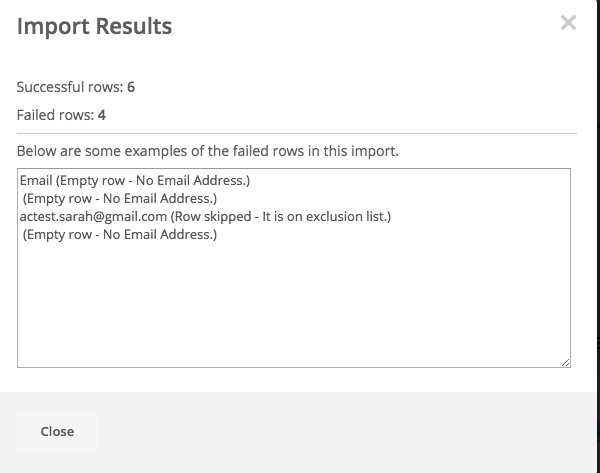
When you import a file, you will be able to view the “Import Results” to see how many rows were successfully imported. To view these results go to the “Contacts” page, click on “Import,” then select “View Recent Imports.” The results will show you how many successful rows were added, as well as how many rows failed and the reason why. In order to access this, you must import at least one file.
In addition, you have the option to view the import report once your file finishes uploading. When you file completes the upload, you will see a screen that looks like this:
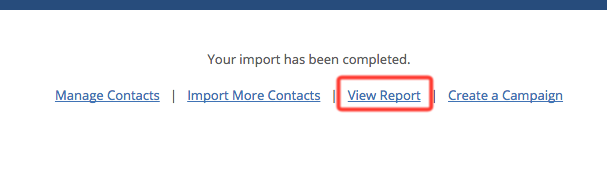
If you click on “View Report,” you will be taken to a page where you can view your report
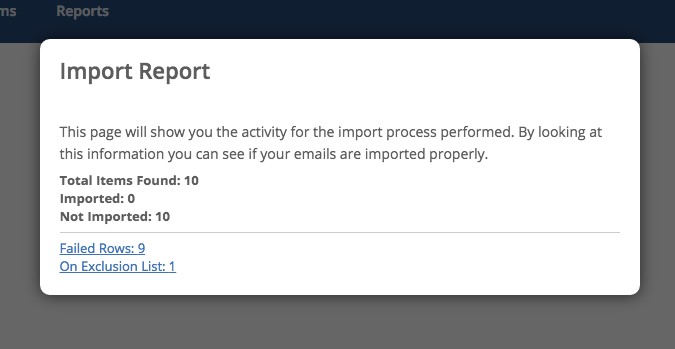
Successful imports with failed rows
This scenario will happen if only some of your contacts are uploaded successfully through the importer while others were not.
- Empty row - No Email Address - This error can appear for a few different reasons. You will first want to make sure that each row you are importing contains a properly formatted email address. If a row has no email address or an improperly formatted email address, then that contact will get skipped by the importer.
- Row skipped - It is on exclusion list - This message will appear if you are trying to upload a contact who is currently on your exclusion list. An exclusion list is a list of contacts who will not receive any emails from you ever.
- Your CSV file has more contacts than your plan allows. If you wish to increase the number of contacts that your plan allows, then you will need to upgrade your account on the Billing & Upgrade page.
- Contact has bounced in the past, is unsubscribed, or you have duplicates of the same contact in your file. If you have any contacts in your file who have had bounces, is unsubscribed, or if you have duplicate contacts in your file, the importer will skip them.
- Your file contains special characters. Special characters include apostrophes (') or backslashes (). If you have any of these characters in your file, you will want to make sure to enclose that particular field with double quotes. For example, if you have a name O'Conner, you will want to make sure that it appears as “O'Conner” in your file.
Failed imports
This scenario will happen if you notice that none of your contacts have been added to your account, or if the import is stuck at 0% for a very long time.
- Use a CSV file with UTF-8 encoding - When formatting a CSV file for upload, we recommend using Google Sheets to create your CSV file and running it through a free validation tool, such as csvlint.io. This will help to ensure your file is properly formatted with the correct encoding.
- File is large or has too many custom fields - If your file is very large or has several fields, we recommend breaking it down into smaller files and removing any unnecessary fields. Especially large files or several extra custom fields can cause the importer to not work.
How to import contacts with multiple tags
To import contacts with multiple tags in one field, list those tags in a single column in your CSV file and separate them with a comma. Your single cell can look like this: Ice Cream,Cookies,Cake. In this case, it does not matter if you choose to use spaces or not in between each of these tags - each of these items will appear as a separate tag for your contact. Since the contents of this cell will automatically be bracketed with double quotes, you do not need to add them (even if you don't see them).
Then on the import page you will want to map your tag column with the "Tags" field.

How to import contacts with multiple values for a single custom field
To import contacts with multiple values for a single custom field, such as a pick list, list those values in your CSV file and separate them with double bars ("||"). Your single cell can look like this: Ice Cream||Cookies||Cake. In this case, it does not matter if you choose to add a space after the double bar - a space will automatically appear in between each field value for your contact. You will then want to map that column in your CSV file with the appropriate custom "List Box" field on the import page.
Column 2